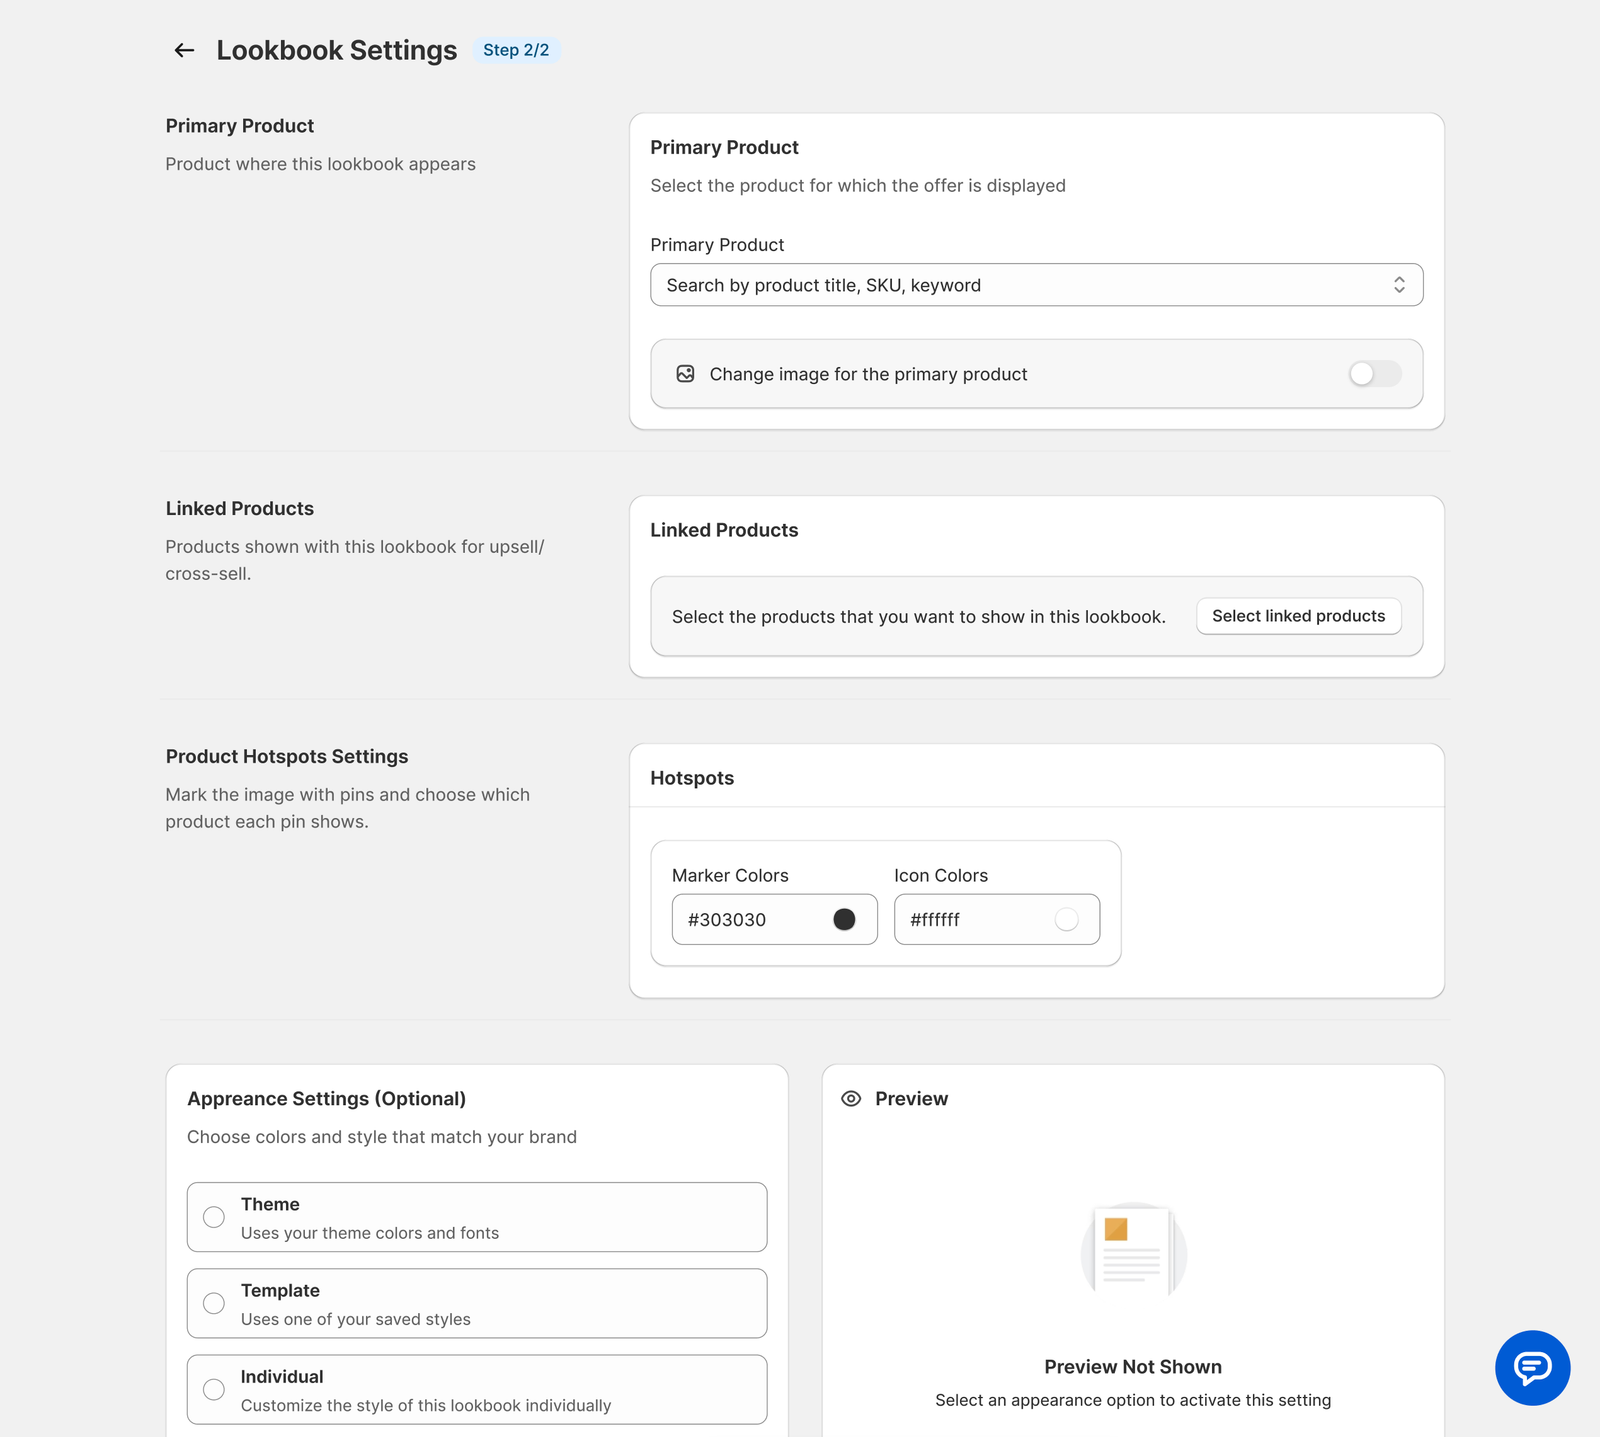
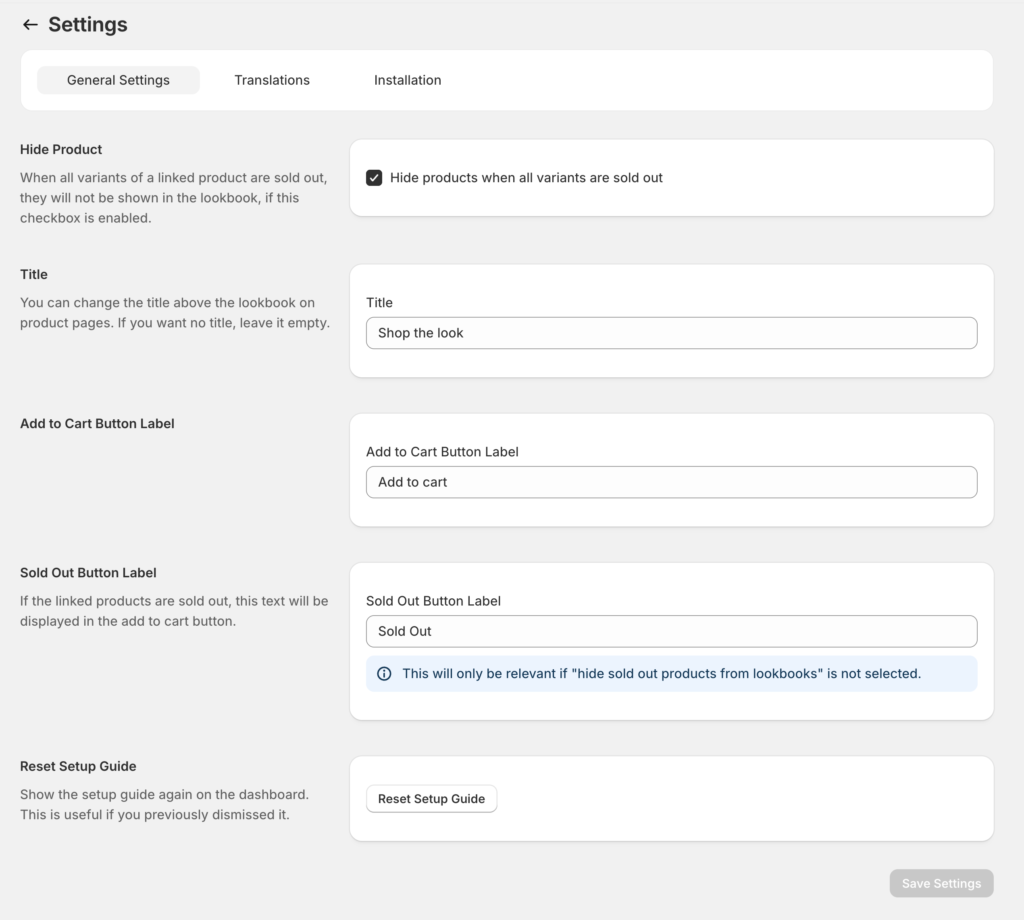
You can add lookbooks to your product page. Follow the steps below or watch the explainer video.
Steps:
1. Go to Online Store → Customize.
2. At the top, select Products → Product page template (usually the Default product template).
3. In the left sidebar, click Add section → Apps.
You will see two Lookbook app blocks:
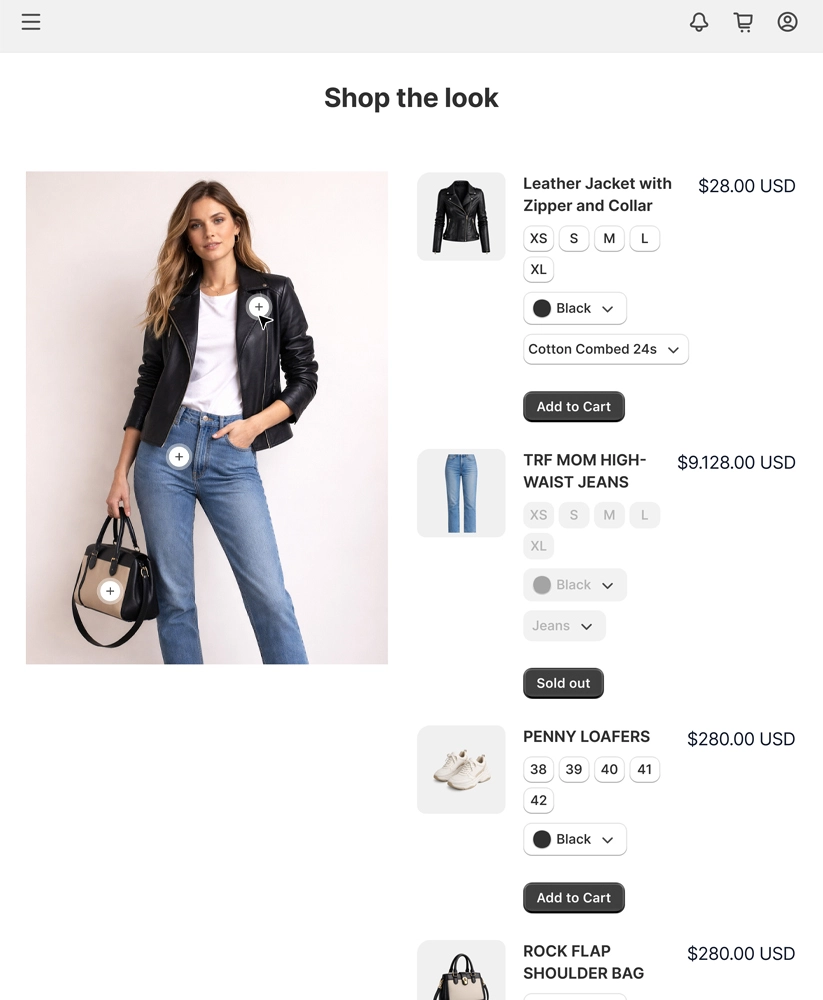
Lookbook – Wide
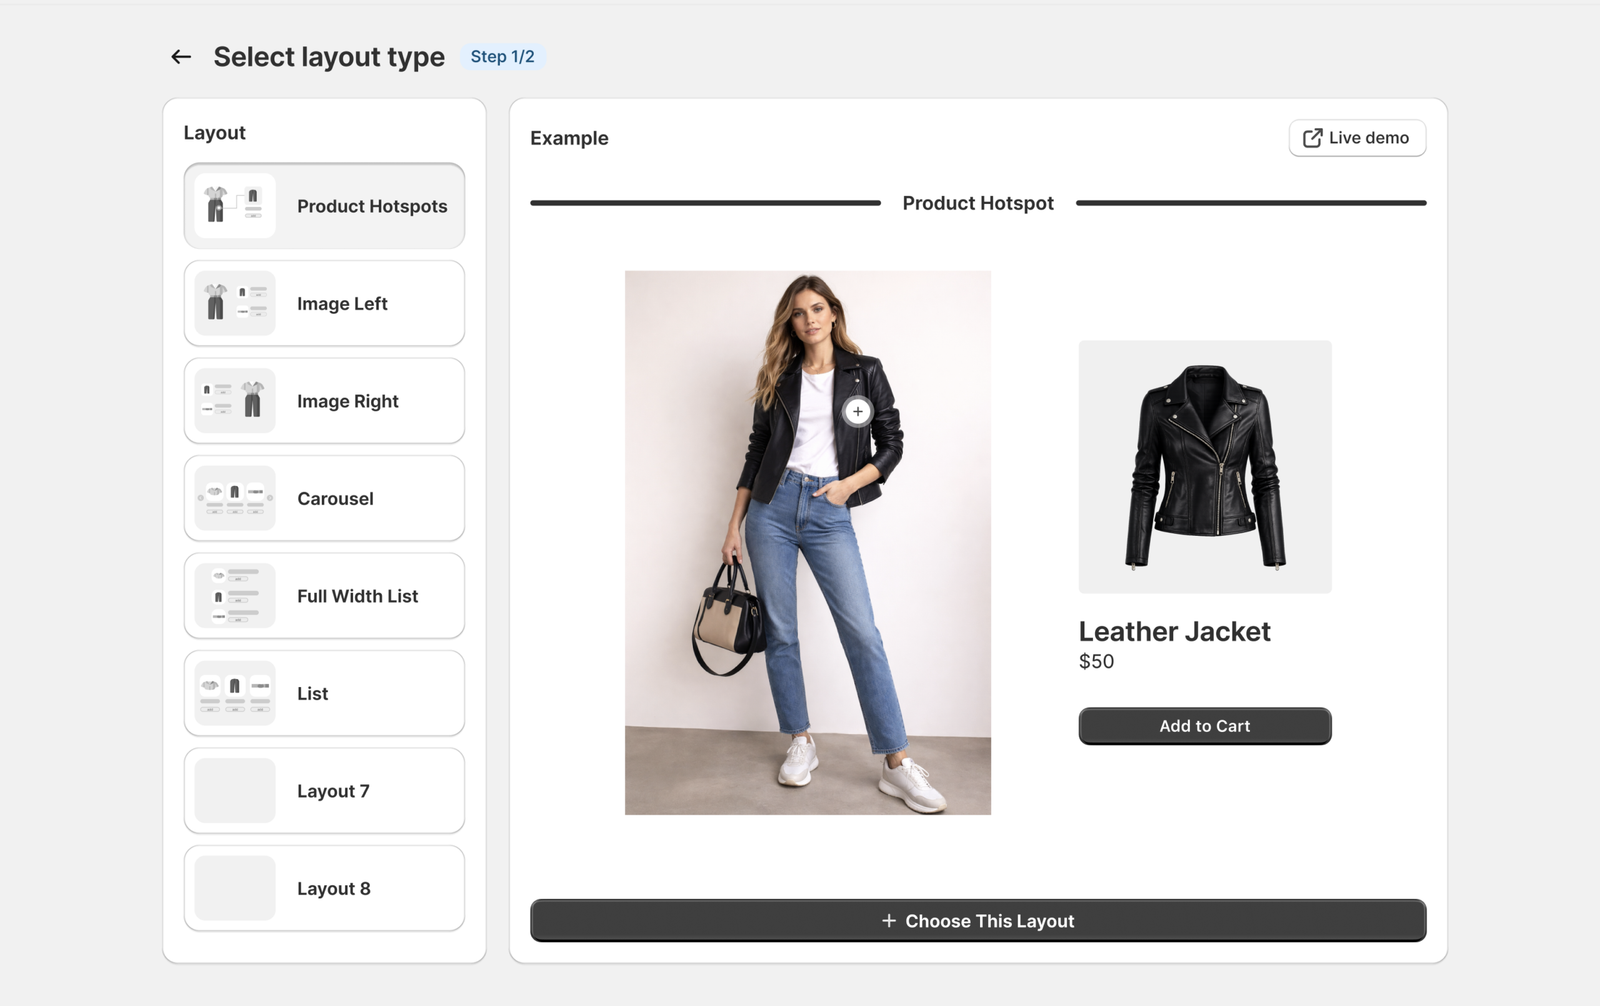
This is used for the layouts: Product Hotspots, Image Left, Image Right, Carousel, Full Width List.
Recommended placement: Below the main product content.
Example:
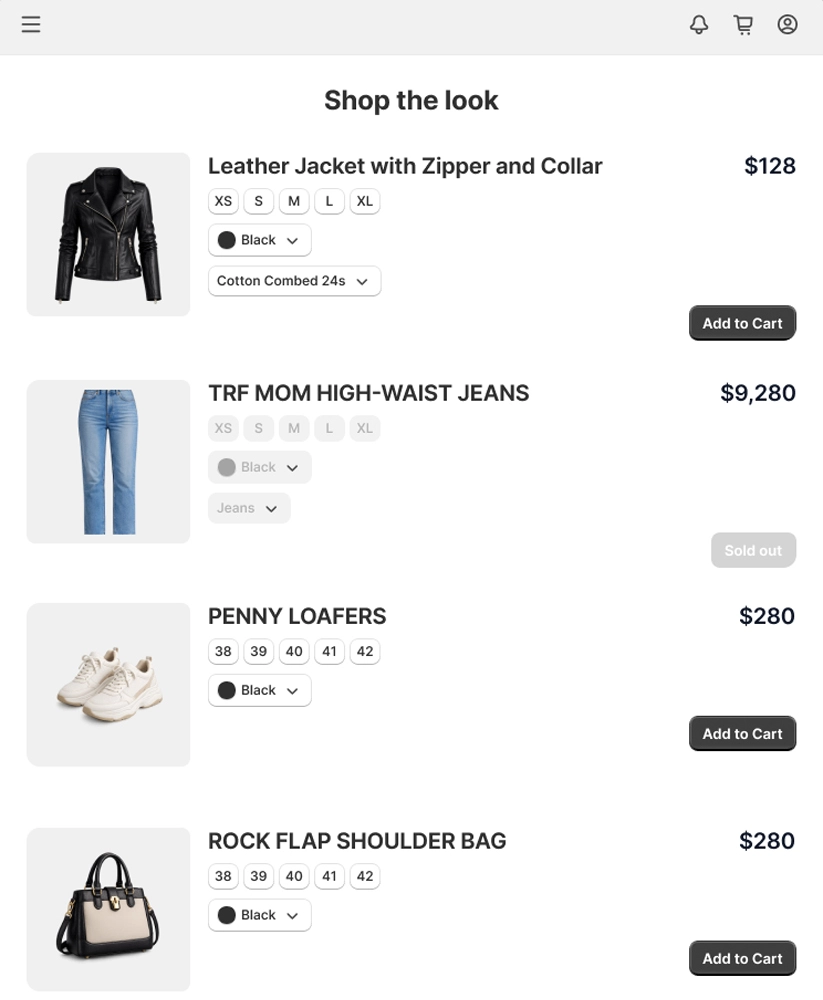
Lookbook – Compact
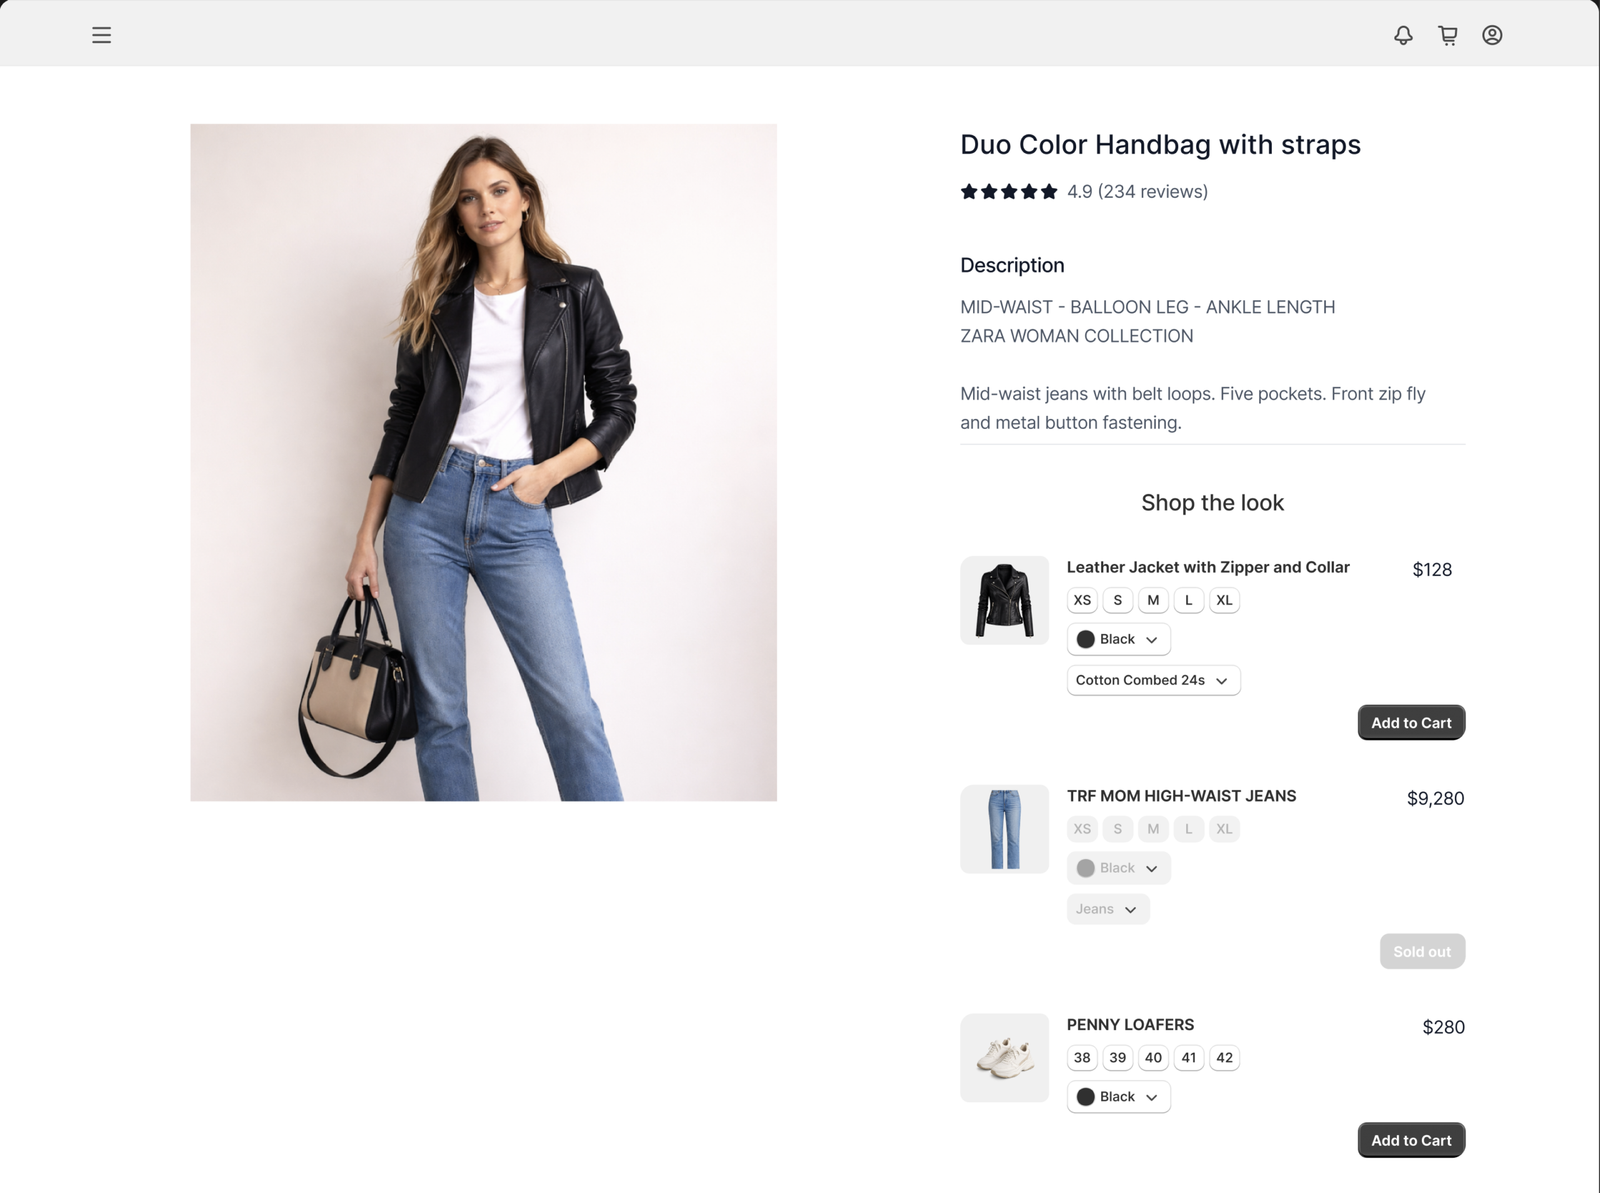
This app block is used for the “List” layout.
Recommended placement: Under the add-to-cart area.
Example:
We recommend adding both app blocks to your product page template.
Depending on the Lookbook layout you selected inside the app, the correct block will automatically appear, and the other one will stay hidden.
If a product has a Lookbook → the correct block is shown.
If a product has no Lookbook → nothing will appear and your product page remains unchanged.
If you don’t see a preview in the Theme Editor, that’s normal.
The block only shows when the selected product has a Lookbook.
4. Save your changes. That’s it.
Note: We try our best to make it look good with most themes by default. We tested the app a lot but it’s possible that sometimes errors happen. If it looks off contact our chat support, we’re happy to help quickly.
You can add lookbooks to pages like the homepage or landing pages. Follow the steps below or watch the explainer video.
Steps:
1. Go to Online Store → Customize.
2. At the top, choose the page you want to edit (e.g. Homepage or a custom page template).
3. In the left sidebar, click Add section → Apps.
4. Select Lookbook – Standalone.
5. In the block settings on the right, choose which Lookbook you want to display.
6. Click Save.
Note: We try our best to make it look good with most themes by default. We tested the app a lot but it’s possible that sometimes errors happen. If it looks off contact our chat support, we’re happy to help quickly.